Continuous Delivery to Azure With AppVeyor
I’ve been using Kudu to automate my website deployments from Github to Azure for quite a while and its worked out great. But there are some limitations with it, primarily a lack of control over whether changes are deployed, its very much an all or nothing tool.
The complexity of the web application I’m maintaining reached a level where I wanted to ensure that the code builds and passes some automated tests before it is deployed. I couldn’t see any way to incorporate those steps into a deployment pipeline with Kudu so decided to try AppVeyor. I’d heard about it on Scott Hanselmans blog and as it is free for open source projects I’d been itching to give it a go!
Build it, build it
The first step was to get the website to build. Surprising as it may seem the website had never successfully built in Visual Studio as it used an old version of Umbraco which had some compile errors. My options were to either upgrade to a newer version or try and fix the compile errors. The upgrade route looked like it could take some time and fortunately Umbraco is open source so I could download the source code for the version with the issues and patch some fixes. It proved fairly straightforward, basically they has just missed out some files during the packaging of the version.
So now the website built locally in Visual Studio, however MSBuild still refused to build the site, not great as AppVeyor uses MSBuild to compile the website! After some research I found that the problem was to do with MSBuild attempting to not just build the website but also publish it. As the project is an old style Visual Studio website as opposed to a web application the options through MSBuild were somewhat limited as it only exposed a subset of the options for the aspnet compiler. However I found that the publish option could be disabled by manually tweaking the solution file to remove the settings controlling the publish of the website, if your interested in the details you can see the change for this in this commit. The only drawback with this technique is that Visual Studio trys to helpfully replace these settings each time you save a change to the solution file, another option I may investigate would be to use a custom build script in App Veyor.
The only additional setup I needed to take to get AppVeyor to build the projects was to tell it to restore the nuget packages, as I hadn’t checked them into source control. This was simply achieved by adding the following ‘Before build script’ to the AppVeyor project settings:
nuget restore
Tasty Tests
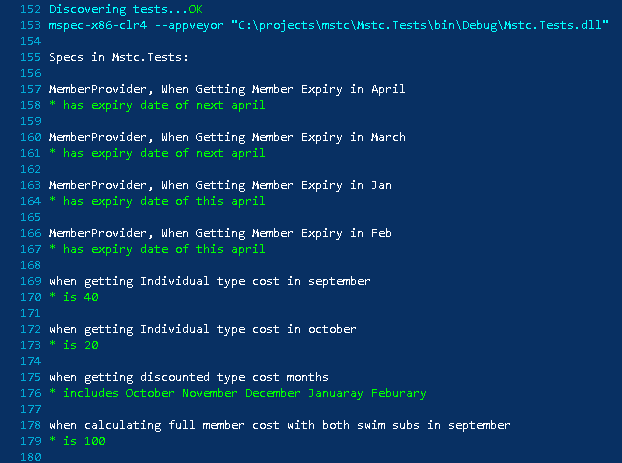
With all the solution projects building the next step was to configure the tests to run. With AppVeyor this is a zero configuration step as it auto detects any projects containing unit tests and runs them. However to speed things along you can explicitly define the path to the assembly containing your tests in the AppVeyor settings. After doing this AppVeyor gives a test runner output in the console (shown below) along with a nice testing report which you can see directly in AppVeyor here.

AppVeyor, meet Azure
The final part of the jigsaw was to setup automated deployments, my requirements for this were:
- Deployment to be triggered after a successful test run (default AppVeyor behaviour)
- Deploy all added, deleted and changed files to Azure
- Deploy changes commited to the staging branch to the staging site
- Deploy changes commited to the master branch to the live site
AppVeyor has a range of options for deployment including several specifically for Azure Cloud sites. However as my application is an old website I just wanted a basic file orientated publish and Web Deploy offered what I was looking for. There is a handy guide on the App Veyor docs for setting up Web Deploy with Azure sites so I won’t repeat that here. However there were some custom configuration steps I needed to take:
- Add a path to the artifacts in App Veyor. These are the files which Web Deploy phyically copys to the Web Server. In my case this was just the whole ‘website’ directory.
- Check the ‘Remove additional files at destination’ option to ensure files I’ve deleted locally are removed from the web server.
- Specify ‘Skip directories’ to ensure assets and cached files for Umbraco are not removed. For my site the ‘Skip directories’ setting is ‘\App_Data;\media;\data’.
- Setup 2 separate Deployment providers, with the ‘Deploy from branch’ option set to ‘staging’ for the staging site and ‘master’ for the live site.
So now whenever I push changes up to github App Veyor checks which branch I’ve pushed to and runs the deployment provider setup for that branch, you can see what has happened at the end of the console report. I’ve been really impressed with the usability and range of options available in App Veyor, it all comes at an unbeatable price of totally free for open source projects and best of all I get to put these cool badges on my repo now!


